
How To Create A WordPress Website

WordPress is one of the Internet's most popular content management systems (CMS), powering millions of websites worldwide. If you want to create a website or blog with WordPress, you'll need to know how to install and customize the platform. In this guide I'll show you how to create a WordPress website using cPanel and Softaculous.
cPanel is a popular web hosting control panel that allows you to manage your web hosting account, whereas Softaculous is a one-click installer that can help you quickly install WordPress on your website.
Step 1: Choose A Domain Name
Try to choose a domain name that is easy to remember, relevant to your website or business, and easy to spell. Keep it short and simple, and if possible, avoid using numbers, hyphens, or special characters.
Step 2: Choose A Web Host
Choose a Web Host that offers cPanel and Softaculous, to make WordPress installation a breeze. We recommend TMD Hosting's Starter Plan, which offers unlimited SSD space, unlimited bandwidth, a free domain, premium support, free cPanel, basic caching, Let's Encrypt SSL, and a 60-day money-back guarantee. You can also check out some of our other top picks in this article:
Top 10 Shared Website Hosting 2023
In this article TMD Hosting was voted 1 of the top 3 Web Hosts for best features with the best price.
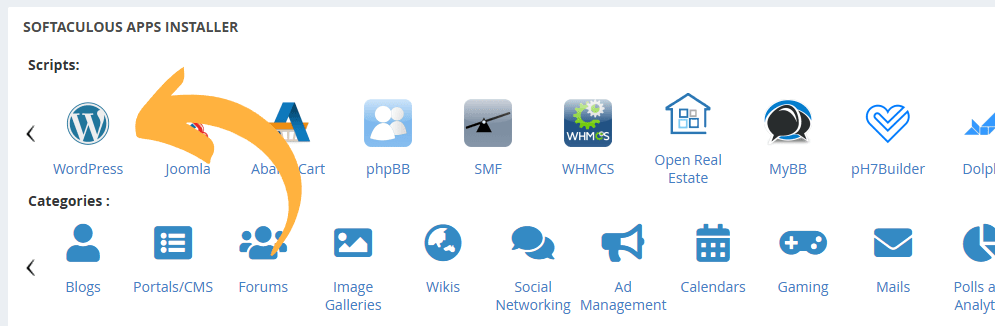
Step 3: Install WordPress In cPanel
1. Sign into cPanel using the login details provided by your Web Host, scroll down to Softaculous Apps Installer and click on WordPress:
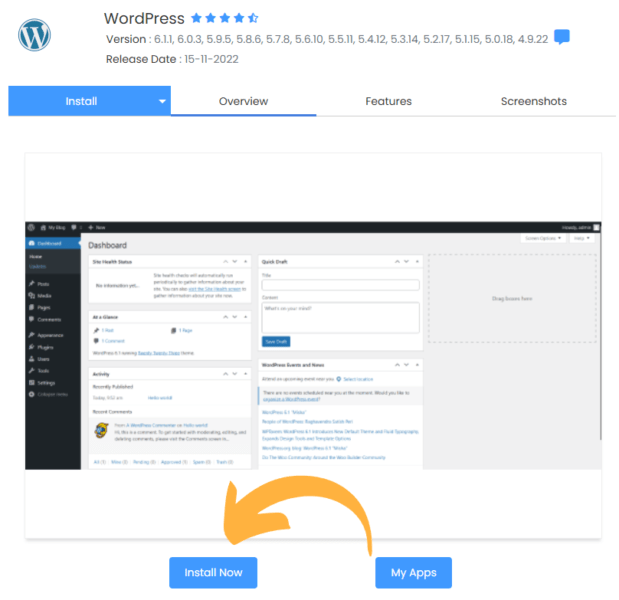
2. Click on “INSTALL NOW”
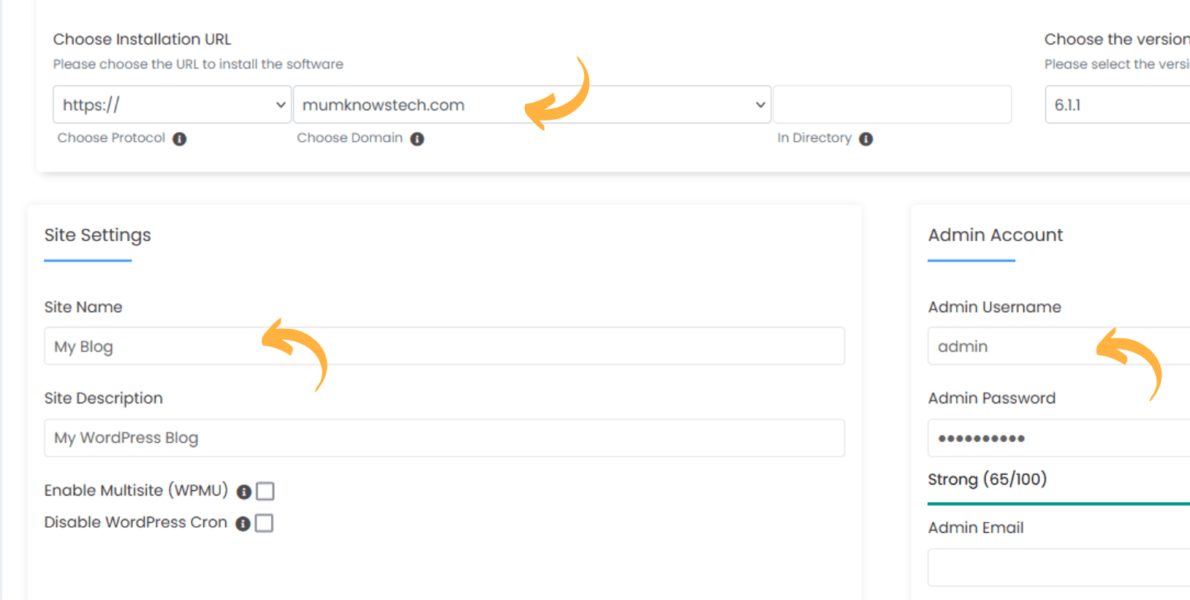
3. Choose your URL, fill in Site Settings and create an admin account.
Make sure you make a copy of your username and password because you'll need them to login to your website.
4. Choose language and Select Plugins:

5. Select A Theme. The default is Twenty Twenty-Three. There are more themes to choose from within the WordPress Dashboard.
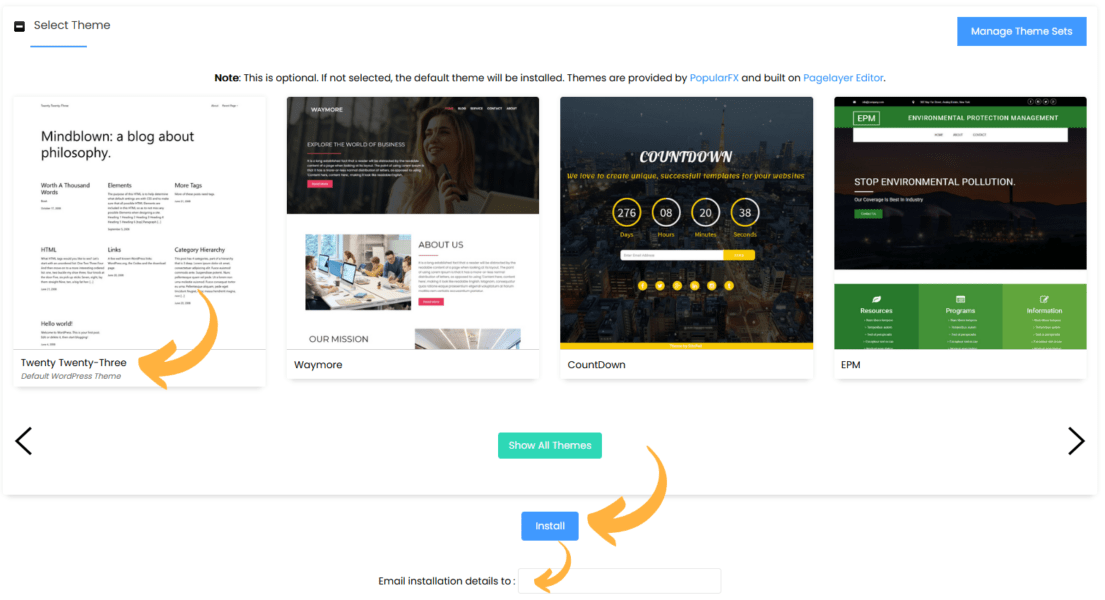
6. Enter your email if you want the installation details sent to you, and click “INSTALL”
7. Once the installation is complete, you will be provided with 2 links on your screen. One for your website's front-end, and the other for the back-end, known as the WordPress Dashboard. Right click both of these links and open them in separate tabs on your browser.
8. Login to your WordPress website and Dashboard.
CONGRATULATIONS, YOU HAVE JUST CREATED YOUR OWN WORDPRESS WEBSITE!
For help with installing a theme and customizing your website, get my free ebook DIY WordPress Website: A Step By Step Guide. Includes helpful tips like adding content, installing plugins, monetizing your website, and an exclusive bonus chapter about tips, tricks and freebies, that are not covered on this website.